If you receive a high volume of emails every day, it can be hard to stay organised. Gmail lets you move emails automatically into custom folders (called labels) using filters — keeping your inbox clean without any manual effort.
Unlike traditional folders, Gmail uses labels to categorise emails. A single email can have multiple labels, which gives you flexibility to view the same email from different folders. The emails still sit in your inbox, but Gmail filters them into the right label automatically.
In the steps below, we will create a custom label and set up a filter so that any new email from a specific sender is automatically moved to that label.
Step 1: Create a Custom Label in Gmail
Click the Settings gear icon in the top right corner of Gmail and select “See all settings”.
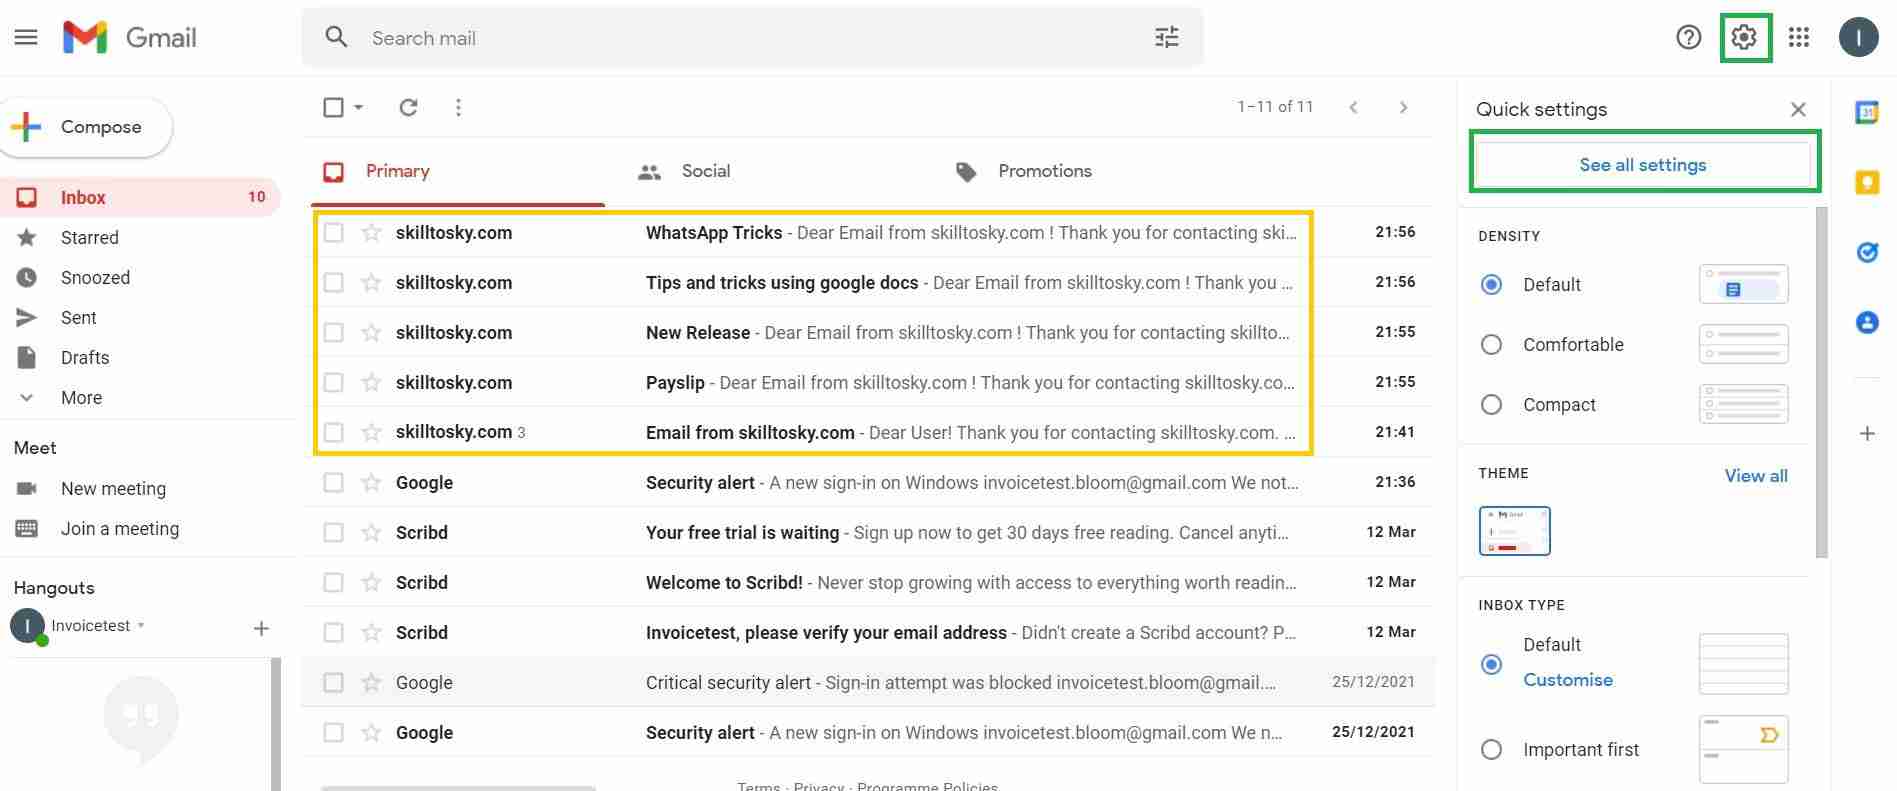
On the next screen, click “Labels” from the top menu. Then click “Create new label”, give it a name, and click “Create”. The new label will appear in the left sidebar of your Gmail.

Step 2: Create a Filter for the Label
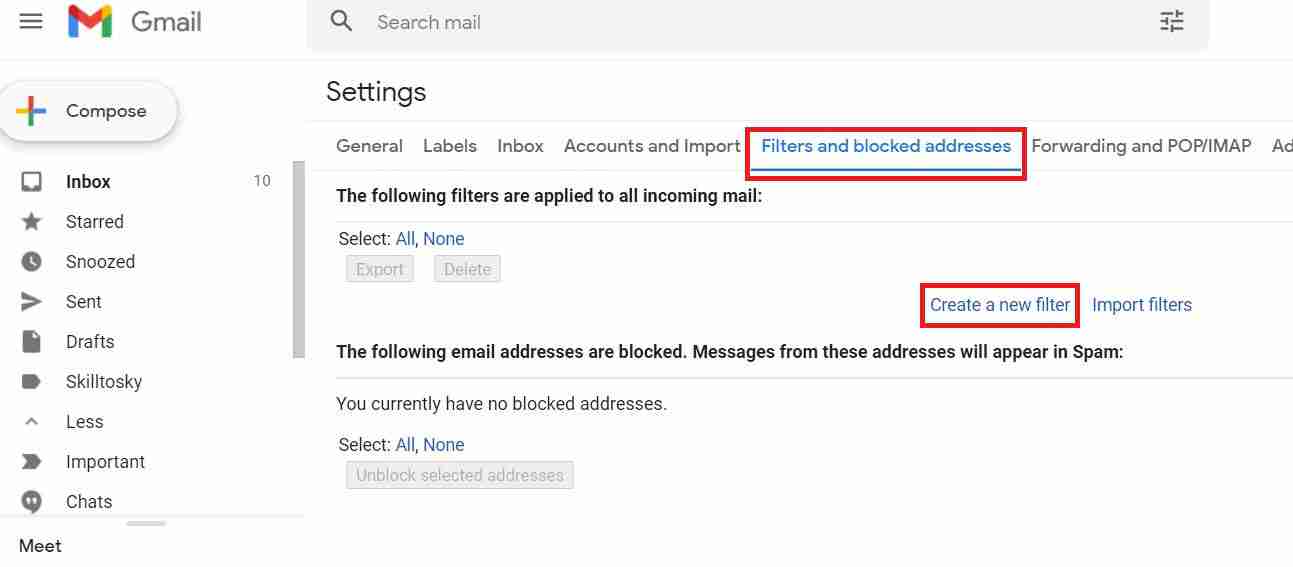
The filter tells Gmail which emails to move and where to send them. To create one, click the Settings gear icon again and select “See all settings”. Go to the “Filters and Blocked Addresses” tab and click “Create a new filter”.
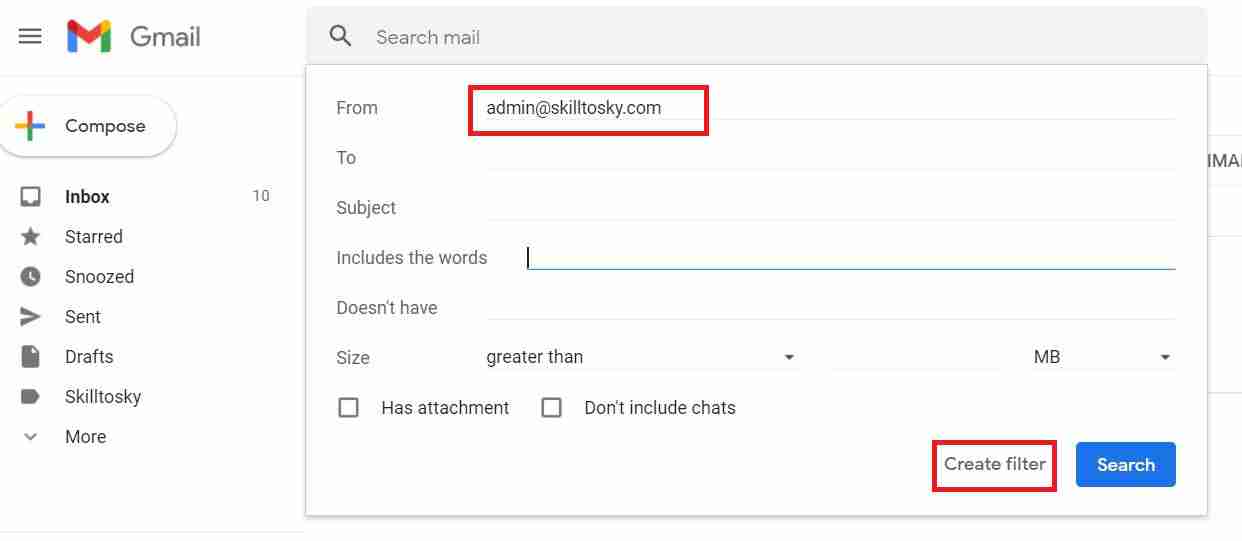
In the popup that appears, enter the sender’s email address in the “From” field. You can also filter by subject, keywords, attachments, and more — but for most cases, the “From” field is enough. Click “Create filter” to proceed.
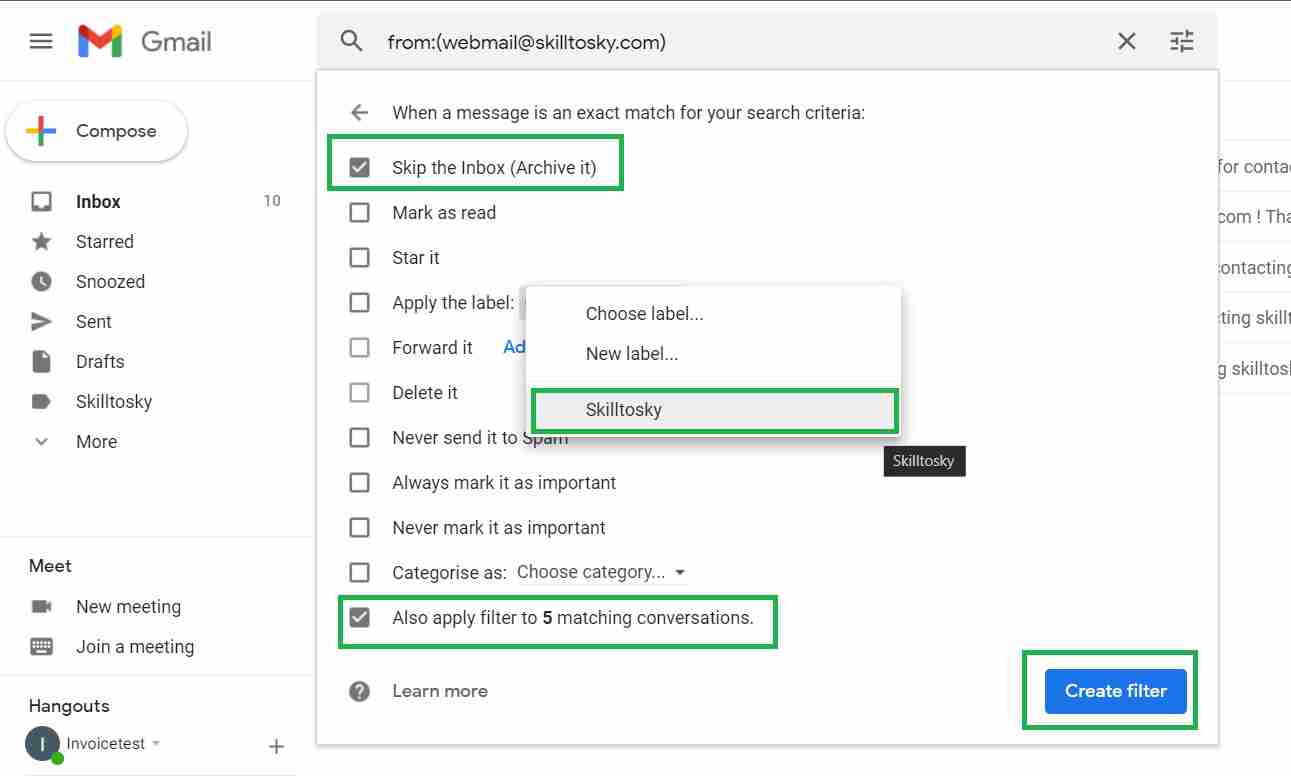
On the next screen, you will see several options. Focus on these three:
- Skip the Inbox (Archive it) — The emails will not appear
in your main inbox. They will go directly to the custom label only. - Apply the label — Select the label you just created.
This is the most important step. - Also apply filter to matching conversations — Tick this
if you want the filter to apply to older emails already in your inbox, not
just new ones.
Once done, click Create filter. From now on, all emails from that sender will automatically go to your custom label.
You will notice straight away that any matching emails are no longer in your main inbox — they have moved to the custom label you created.

Frequently Asked Questions
Can I move emails from multiple senders to the same label?
Yes. Simply create additional filters for each sender and select the same label in the “Apply the label” step. All of them will be routed to the same folder.
How do I move all emails from one sender to a label at once?
When setting up the filter, tick the “Also apply filter to matching conversations” option. This will apply the filter to all existing emails from that sender, not just future ones.
What is the difference between Skip Inbox and Apply the label?
Apply the label moves the email to your custom folder but it will still appear in your main inbox as well. Skip the Inbox removes it from the inbox entirely, so it only lives in the custom label. Use both together if you want emails sorted without cluttering your inbox.
Can I edit or delete a Gmail filter later?
Yes. Go to Settings → See all settings → Filters and Blocked Addresses. You will see a list of all your active filters with options
to edit or delete each one.
Excellent straight-forward instruction !