Windows 11 Running Slow? 10 Proven Ways to Speed Up Your PC
 Windows
Is your Windows 11 computer running slower than it should? You’re not alone. Many users experience performance issues after upgrading to Windows 11 or following system updates. The good news is that most slowdowns can be fixed with a few tweaks and optimizations.
In this comprehensive guide, we’ll walk you through 10 proven methods to speed up your Windows 11 PC and restore its performance.
Why Is Windows 11 Running Slow?
Before diving into solutions, let’s understand common causes:
- Too many startup programs running in the background
- Outdated or corrupted drivers
- Insufficient RAM or storage space
- Visual effects consuming system resources
- Malware or bloatware
- Fragmented hard drive (on HDDs)
- Outdated Windows version
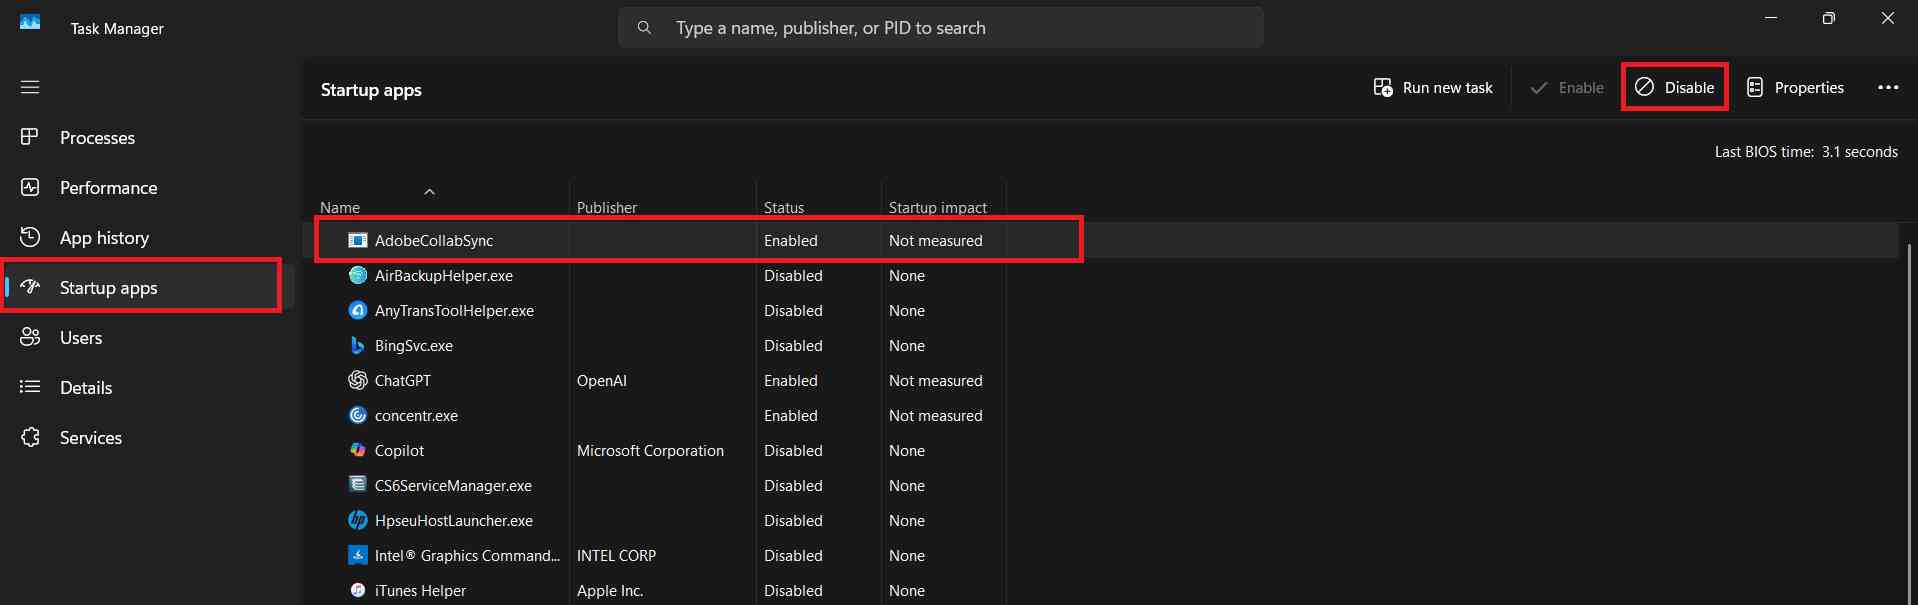
1. Disable Startup Programs
Many applications automatically launch when you boot up Windows, consuming valuable resources.
Steps to disable startup programs:
- Press Ctrl + Shift + Esc to open Task Manager
- Click on the “Startup” tab
- Review the list of programs and their impact on startup
- Right-click on programs you don’t need at startup
- Select “Disable”
Focus on disabling high-impact programs that you rarely use. Keep essential applications like antivirus software enabled. Below is the example screenshot:
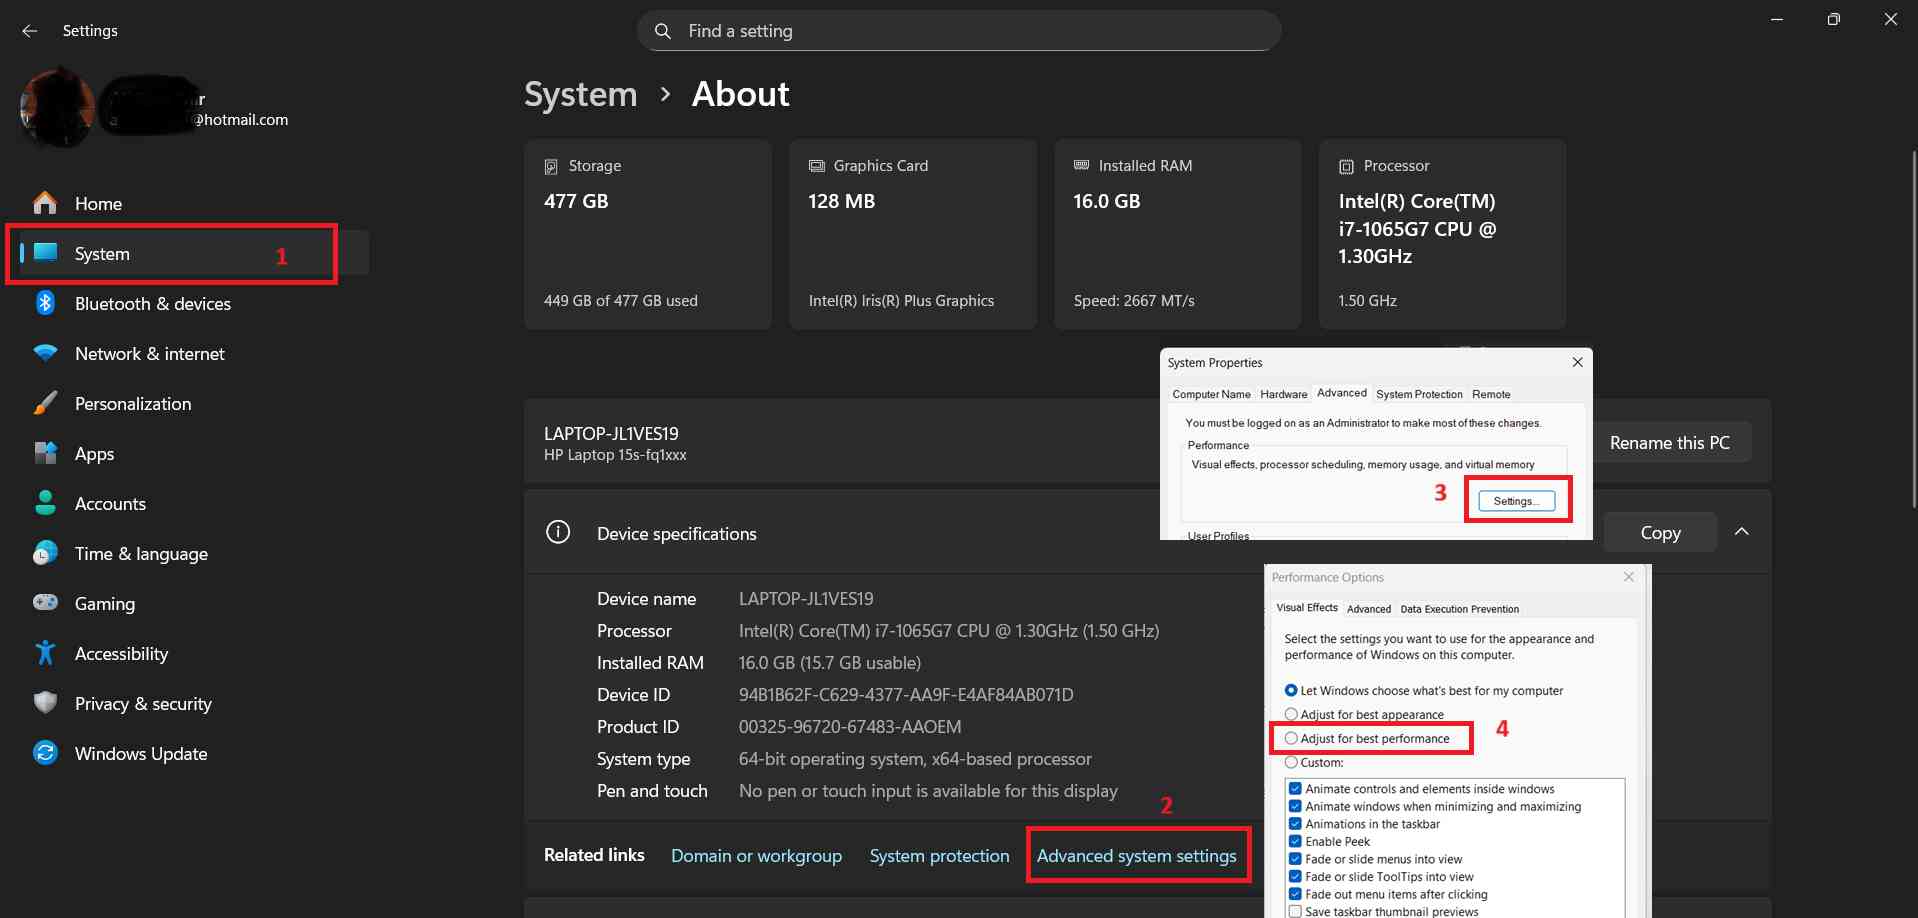
2. Adjust Visual Effects for Best Performance
Windows 11 comes with numerous visual effects that look great but can slow down older systems.
To optimize visual effects:
- Press Windows + I to open Settings
- Go to System > About
- Click “Advanced system settings”
- Under Performance, click “Settings”
- Select “Adjust for best performance” or manually uncheck effects you don’t need
- Click “Apply” and “OK”
This simple change can significantly improve system responsiveness, especially on computers with limited RAM.
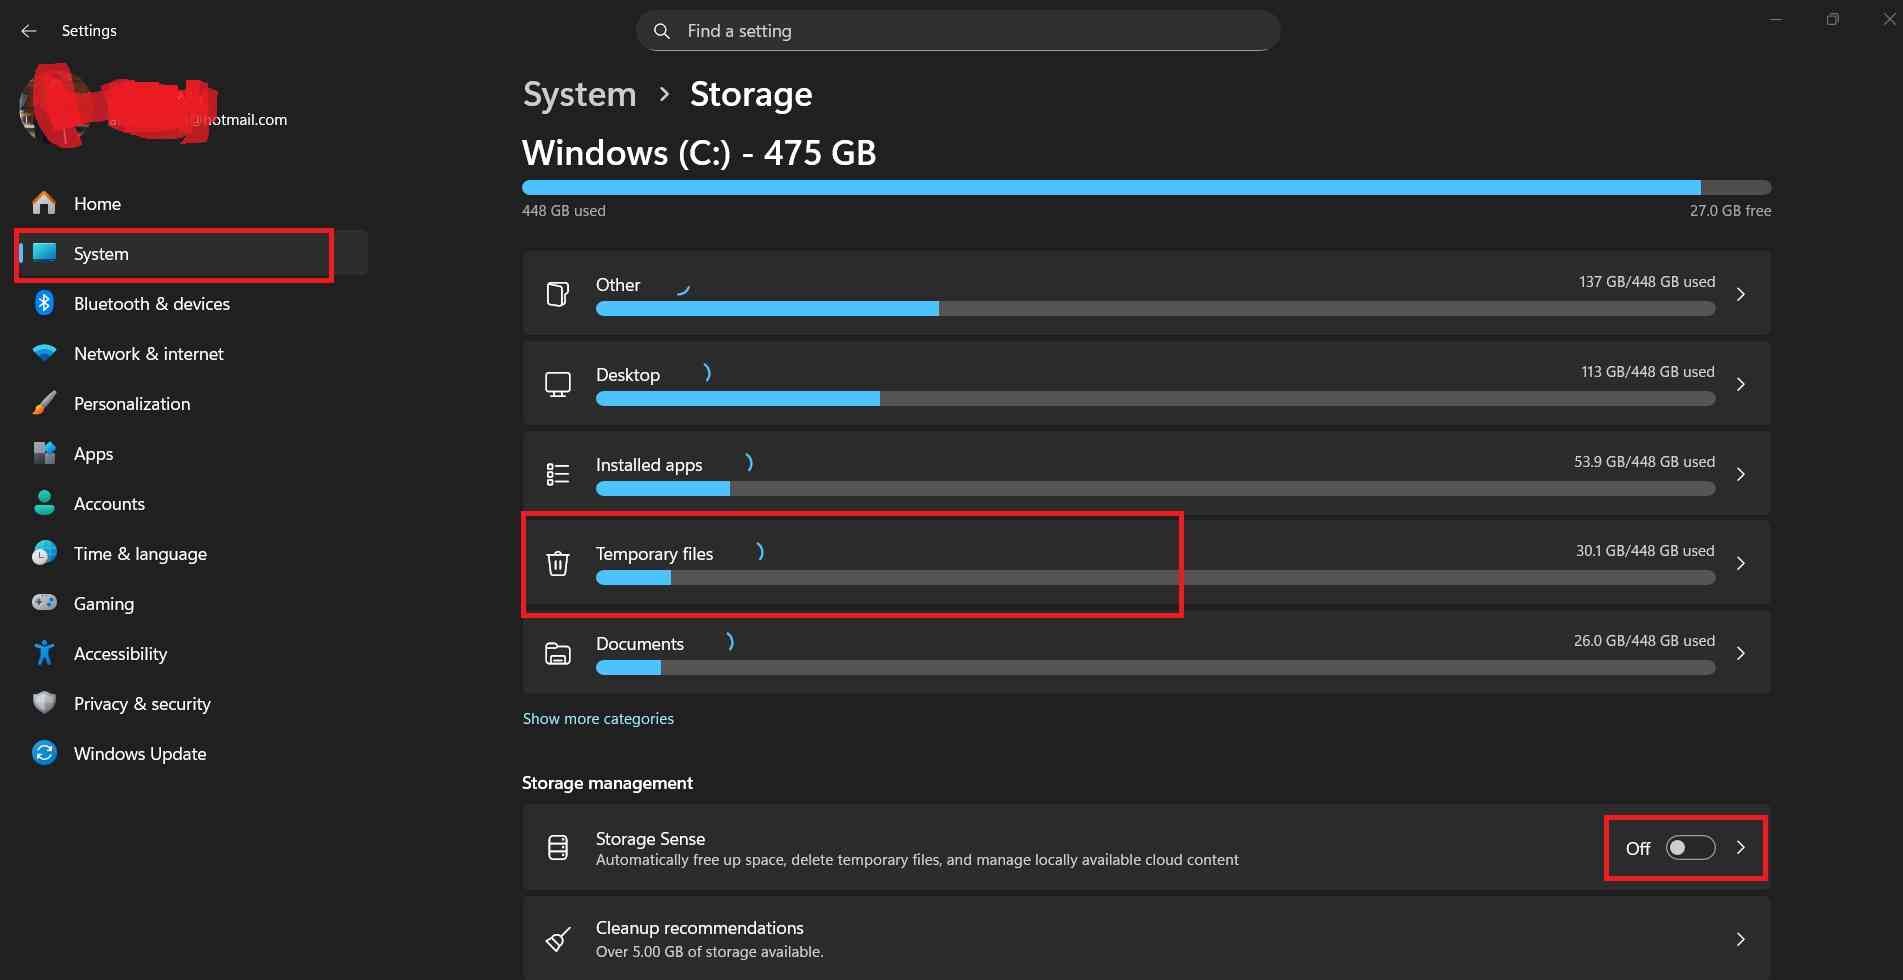
3. Run Disk Cleanup and Storage Sense
Accumulated temporary files, system cache, and old updates can consume gigabytes of storage.
To free up disk space:
- Open Settings (Windows + I)
- Navigate to System > Storage
- Turn on “Storage Sense” for automatic cleanup
- Click “Temporary files”
- Check all categories you want to remove
- Click “Remove files”
For deeper cleaning, search for “Disk Cleanup” in the Start menu and run it as administrator to access system files.
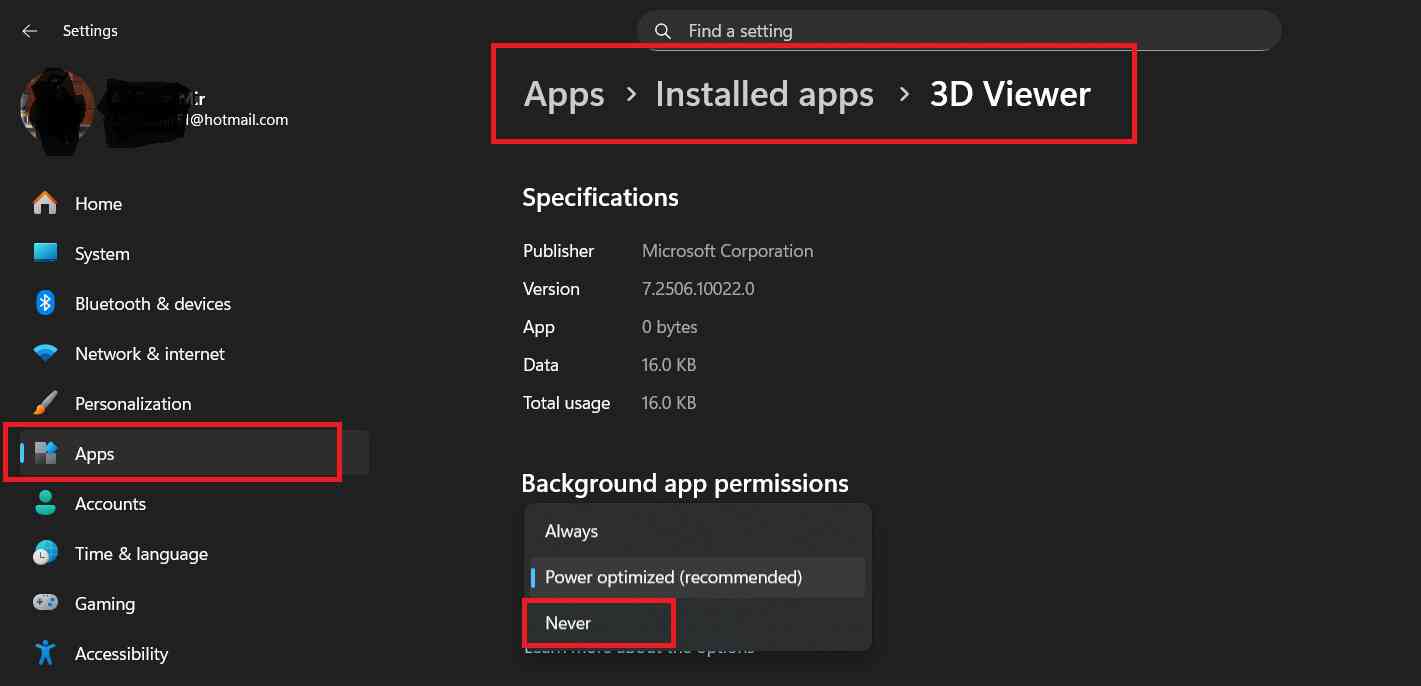
4. Disable Background Apps
Many apps run in the background even when you’re not using them, draining system resources.
To manage background apps:
- Open Settings (Windows + I)
- Go to Apps > Installed apps
- Click the three dots next to any app
- Select “Advanced options”
- Under “Background apps permissions,” choose “Never”
Repeat this for apps that don’t need to run constantly in the background.
5. Update Windows and Drivers
Outdated software can cause compatibility issues and slow performance.
To update Windows 11:
- Open Settings
- Click Windows Update
- Click “Check for updates”
- Install all available updates
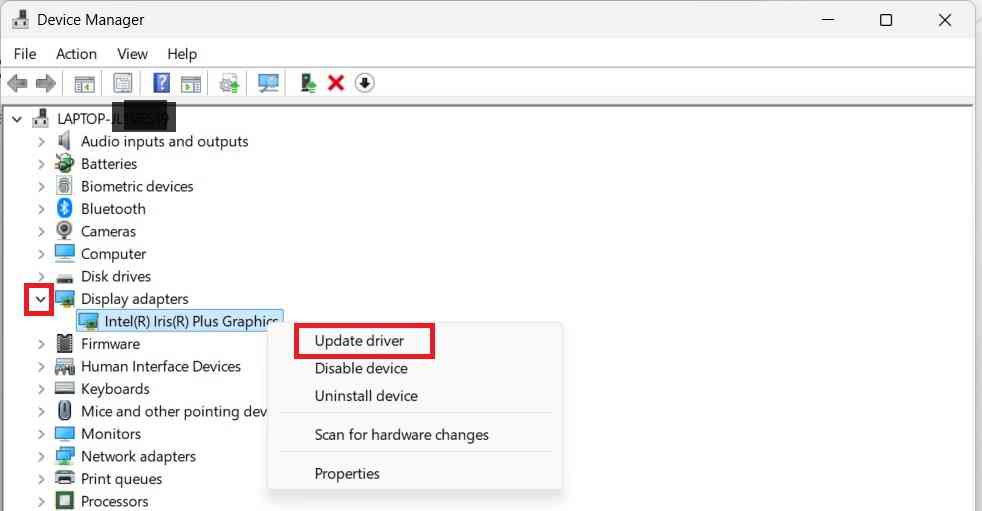
To update drivers:
- Right-click the Start button
- Select “Device Manager”
- Right-click on devices (especially graphics cards and network adapters)
- Select “Update driver”
- Choose “Search automatically for drivers”
6. Scan for Malware and Viruses
Malware can significantly impact system performance by consuming resources and running malicious processes.
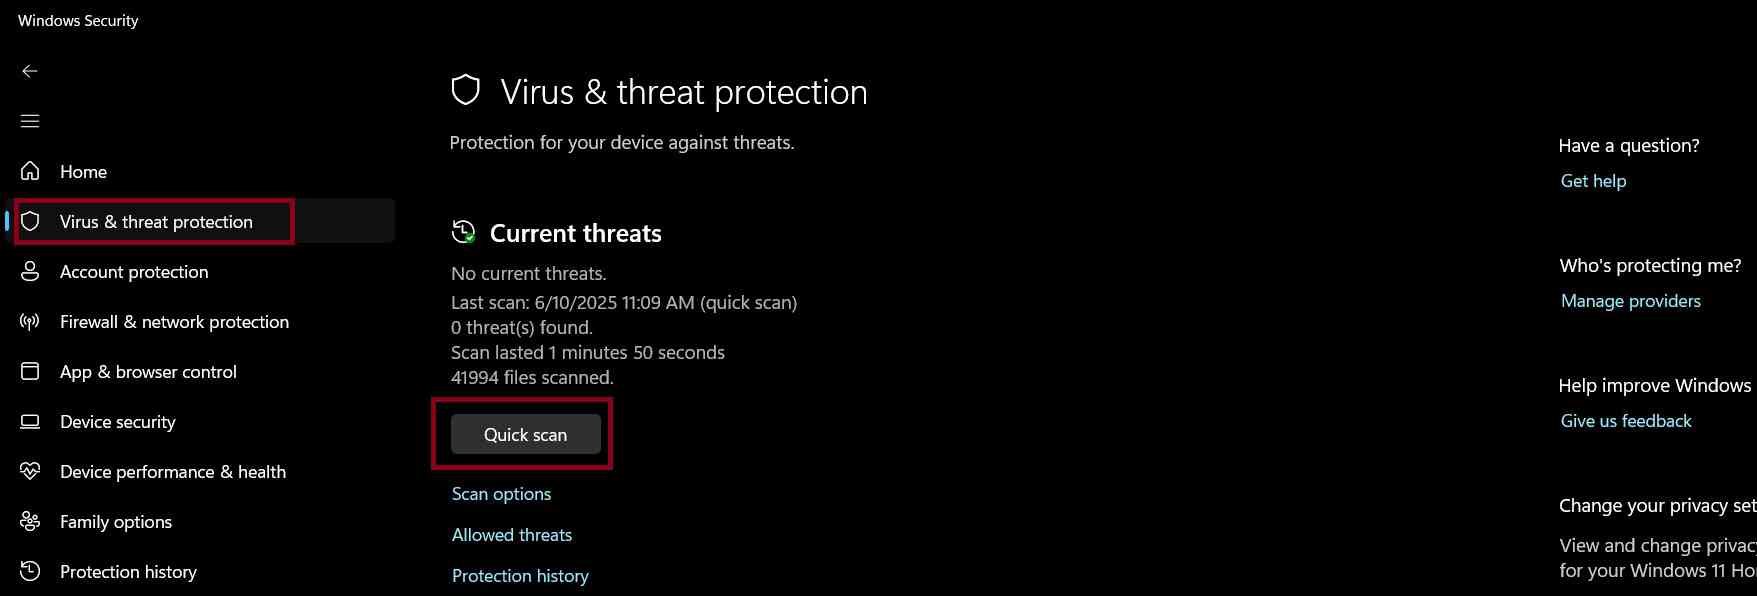
To scan your system:
- Open Windows Security (search in Start menu)
- Click “Virus & threat protection”
- Select “Quick scan” or “Scan options” for a full scan
- Follow prompts to remove any threats
Consider running additional scans with reputable third-party antivirus software for comprehensive protection.
7. Adjust Power Settings
Windows 11’s default power plan may prioritize energy efficiency over performance.
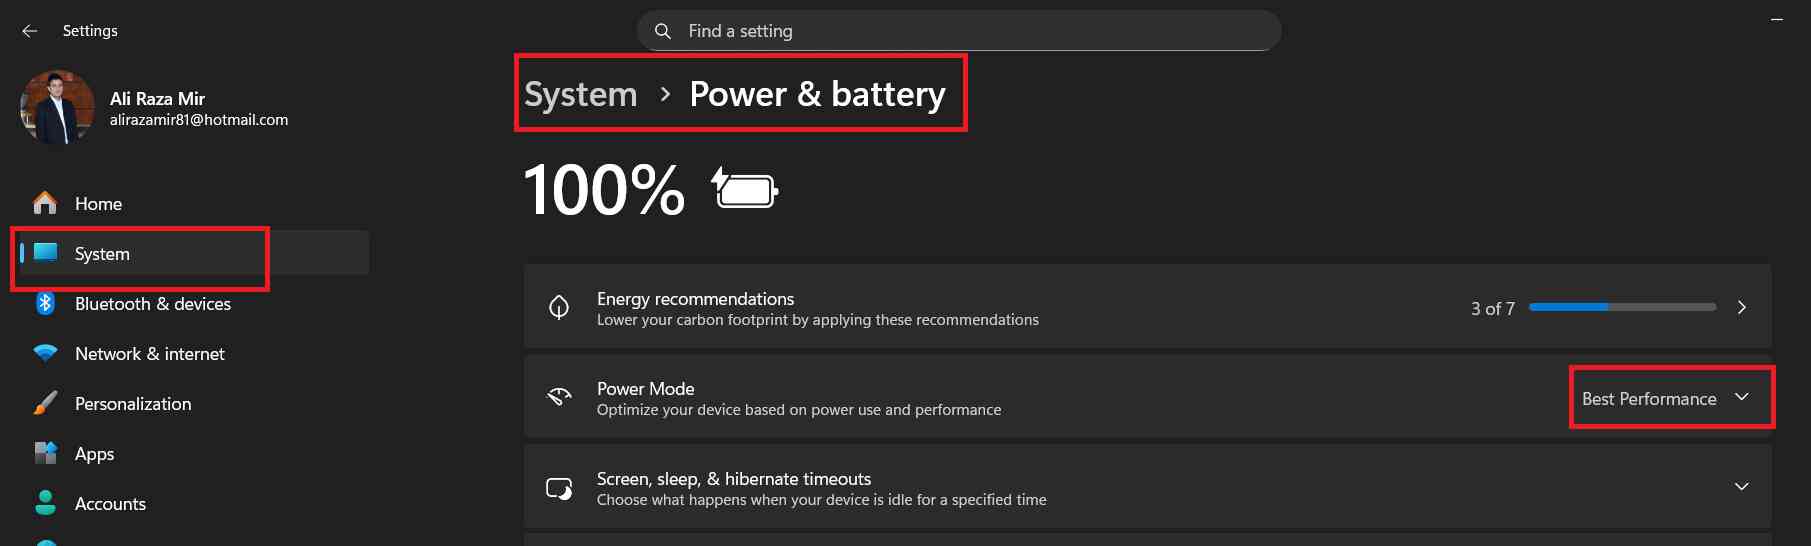
To change power settings:
- Open Settings
- Go to System > Power & battery
- Click “Power mode”
- Select “Best performance”
For laptops, this will drain battery faster but provide better performance when plugged in.
8. Disable Windows Search Indexing (Optional)
Windows Search indexing helps find files quickly but can slow down older systems.
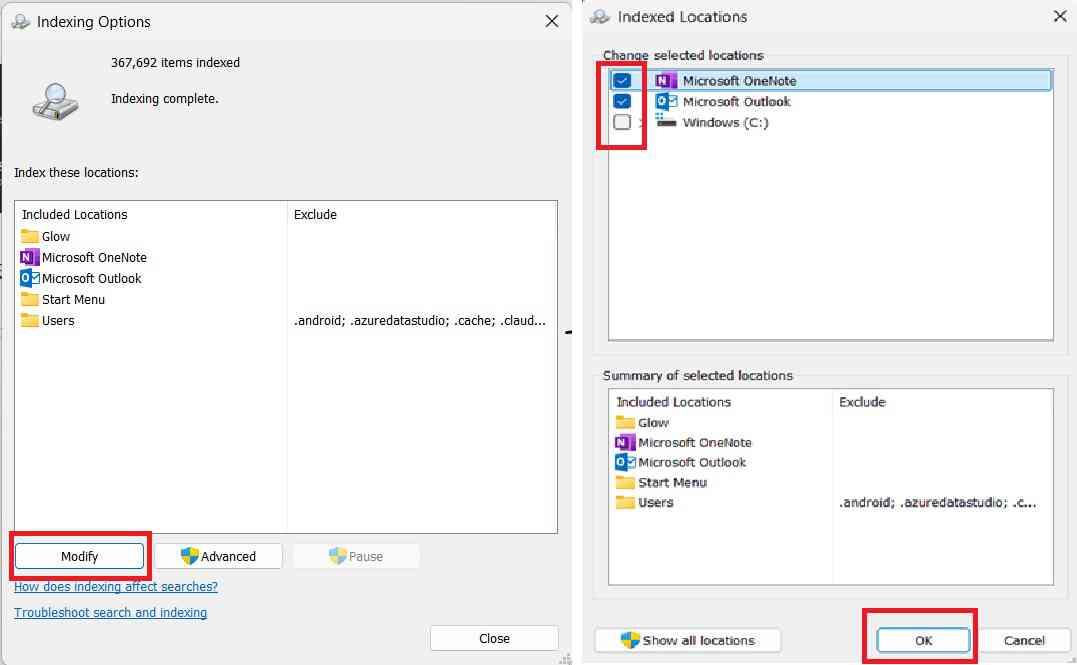
To disable or limit indexing:
- Search for “Indexing Options” in Start menu
- Click “Modify”
- Uncheck locations you don’t need indexed
- Click “OK”
Note that this will make file searches slower, so only do this if you have significant performance issues.
9. Upgrade Your Hardware
If software optimizations aren’t enough, consider hardware upgrades:
RAM Upgrade: Adding more RAM (8GB minimum, 16GB recommended) provides the biggest performance boost for multitasking.
SSD Upgrade: Replacing a traditional hard drive with an SSD dramatically improves boot times and application loading.
Graphics Card: For gaming or creative work, a dedicated GPU can relieve pressure on your CPU.
Check your system specifications to ensure compatibility before purchasing hardware.
10. Perform a Clean Install (Last Resort)
If all else fails, a fresh Windows 11 installation can resolve deep-seated issues.
Before clean installing:
- Back up all important files to external storage or cloud
- Note down installed programs and licenses
- Create a Windows 11 installation media using Microsoft’s Media Creation Tool
To perform a clean install:
- Boot from the installation media
- Follow the installation wizard
- Choose “Custom installation”
- Format your system drive and install Windows
This gives you a fresh start without accumulated clutter and corrupted files.
Additional Quick Tips
- Keep at least 15-20% of your storage drive free for optimal performance
- Restart your PC regularly to clear memory
- Uninstall programs you no longer use
- Check for BIOS updates from your computer manufacturer
- Consider disabling transparency effects in Settings > Personalization > Colors
Conclusion
A slow Windows 11 PC doesn’t necessarily mean you need a new computer. By following these 10 methods, you can significantly improve your system’s performance and responsiveness. Start with the easiest solutions like managing startup programs and adjusting visual effects, then move to more advanced options if needed.
Remember that regular maintenance is key to keeping your PC running smoothly. Enable Storage Sense, update regularly, and monitor your system’s resource usage to catch issues early.
If you found this guide helpful, bookmark it for future reference and share it with others experiencing Windows 11 performance issues.
Have you tried any of these methods? Let us know in the comments which solution worked best for you!