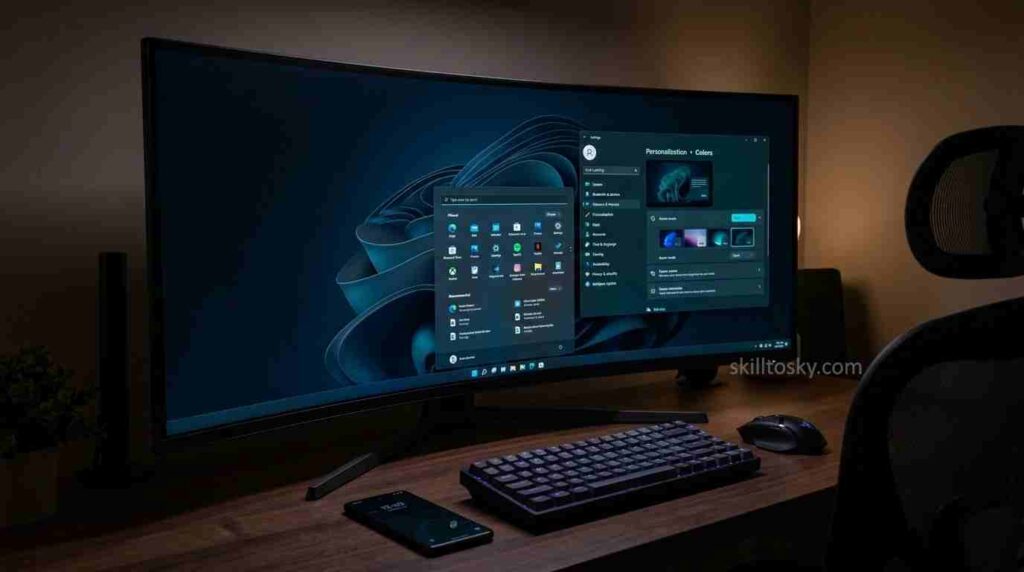
Windows 11 dark mode is more than just a visual treat — it genuinely helps reduce eye strain, especially during long hours in front of the screen. The good news is that Windows 11 comes with built-in dark mode support, so there is no need to install any third-party software to get it working. Once enabled, it transforms the appearance of window panels such as File Explorer, Documents, the taskbar, title bars, borders, and system settings. What makes it even better is that popular browsers like Google Chrome and many other apps automatically pick up the dark theme from your Windows color settings — a small but satisfying touch. Let’s get right into it.
Browse the “Personalization” Settings
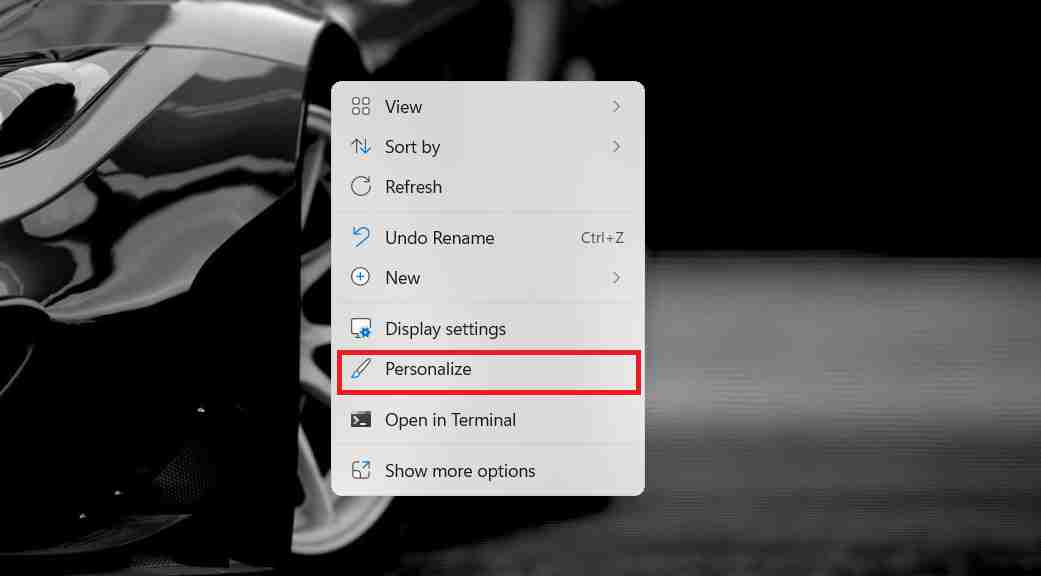
To get started, right-click on any empty area of your desktop and select “Personalize” from the context menu. This will take you directly into the Personalization settings where all the visual customization options live.
Alternatively, click the Windows Start button, type “Settings” in the search bar, open the Settings app, and then select “Personalization” from the left-hand panel.
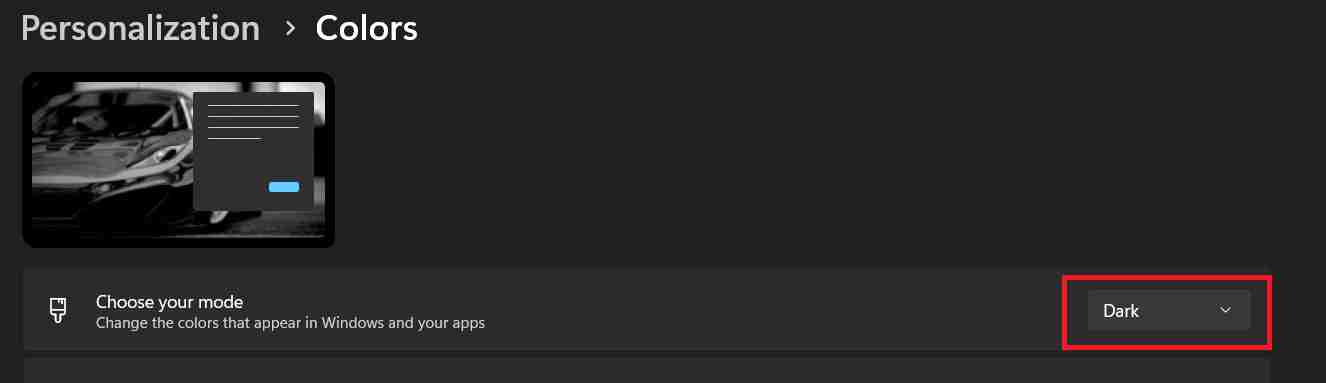
Once you are inside the Personalization settings, click on the “Colors” option. This will open the Personalization › Colors page. Look for the “Choose your mode” dropdown and select “Dark” from the available options.
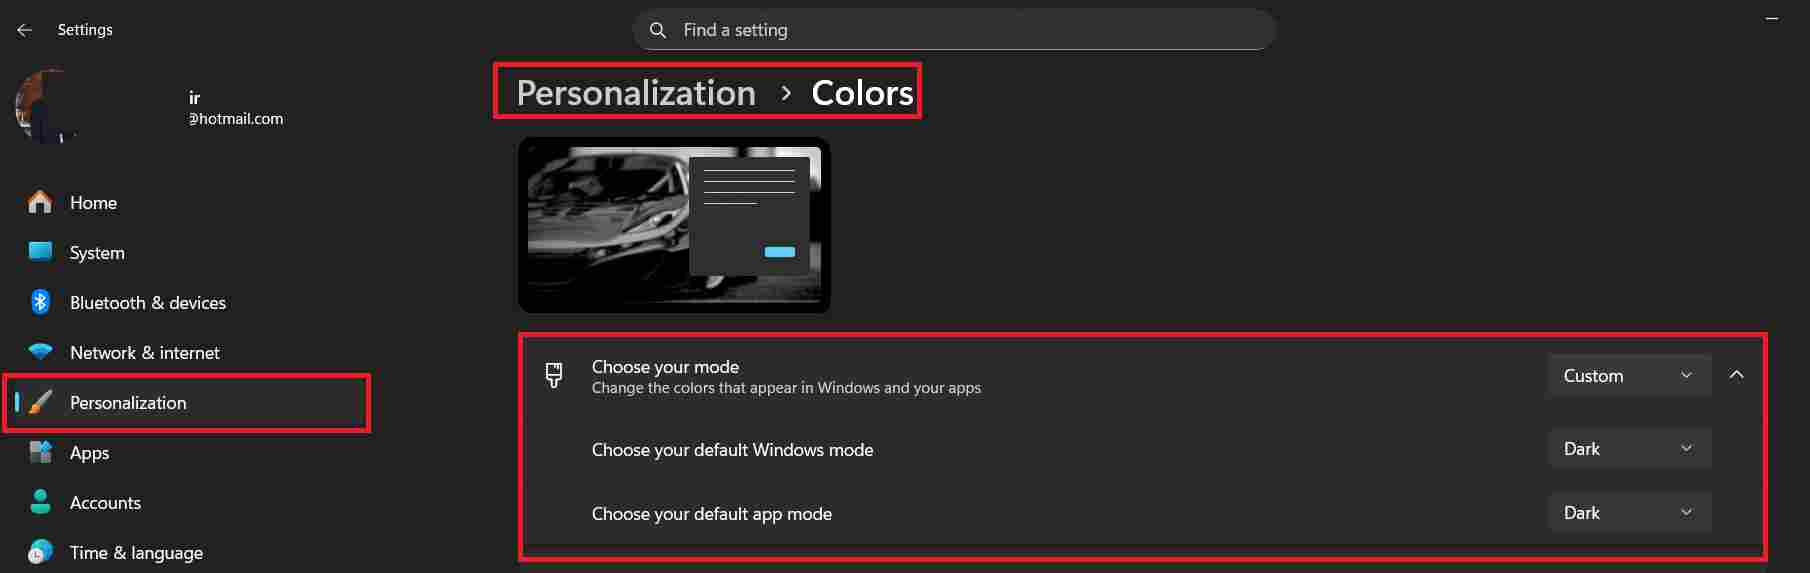
Under “Choose your mode”, you will find three options — Light, Dark, and Custom. If you select Custom, Windows gives you more flexibility by letting you separately control the “Windows mode” and the “App mode”. This is handy if, for example, you want your desktop and taskbar to stay light while your apps switch to dark, or the other way around.

Once you make your selection, the changes apply instantly — no restart required. That’s all it takes to switch to dark mode on Windows 11 and give your eyes a well-deserved break.
For Windows 10 Dark Mode, refer to the blog post How to enable windows 10 dark mode
How to Schedule Dark Mode in Windows 11
Windows 11 lets you automatically switch between Light and Dark mode based on
the time of day — no manual toggling needed. Unfortunately, Windows 11 does not
have a built-in sunrise/sunset scheduler in Settings. The most reliable
workaround is the free Auto Dark Mode app available from the
Microsoft Store. Once installed, it lets you set exact times for the switch —
for example, automatically enabling dark mode at 7:00 PM and switching back to
light at 7:00 AM. It runs silently in the background and requires no
maintenance.
Windows Mode vs App Mode — What Is the Difference?
To access these settings, go to Settings → Personalization → Colors
and under “Choose your mode”, select Custom.
This unlocks two independent dropdowns:
- Windows mode — controls the appearance of the Windows
shell itself: the taskbar, Start menu, File Explorer, title bars, and system
panels. - App mode — controls the colour scheme inside supported
apps such as Settings, Microsoft Edge, Notepad, and other modern Windows
apps.
These two settings work independently, so you can mix and match them to suit
your preference. For example, if you set Windows mode to Light
and App mode to Dark, your desktop and taskbar stay bright
while your apps switch to a dark interface. Conversely, setting
Windows mode to Dark and App mode to Light
gives you a dark taskbar and shell with light-themed apps.
Dark Mode Not Working? Here’s What to Check
If dark mode is not applying to some apps after enabling it, there are a few common reasons:
- The app does not support dark mode natively. Some older or third-party apps use their own colour scheme and ignore Windows system settings entirely. There is no workaround for this — you would need to check if that specific app has its own dark mode setting inside it.
- The app is set to Light mode independently. Apps like Microsoft Office and some browsers have their own theme settings. Check the app’s settings and switch it to “Use system setting” or “Dark” manually.
- You selected Custom mode but only changed one setting. If you chose Custom and only changed Windows mode but left App mode on Light, your apps will stay light. Make sure both are set to Dark if you want full dark mode everywhere.
Frequently Asked Questions
Does dark mode save battery on Windows 11?
It depends on your screen type. If your laptop or monitor uses an OLED or AMOLED display, dark mode can noticeably extend battery life because black pixels are turned off entirely on these screens. However, if your device uses a standard LCD display (which most Windows laptops do), dark mode has little to no measurable impact on battery life since the backlight stays on regardless.
How do I turn off dark mode in Windows 11?
Go to Settings → Personalization → Colors, click the “Choose your mode” dropdown, and select Light. The change applies instantly with no restart needed.
Does enabling dark mode affect all apps?
Most modern Windows apps and browsers like Chrome, Edge, and Firefox will automatically follow your system dark mode setting. However, some older desktop applications (.exe programs) do not support Windows theming at all and will remain in their default appearance regardless of your system setting.
Can I use dark mode for apps but keep the desktop and taskbar light?
Yes — this is exactly what the Custom mode is for. Go to Settings → Personalization → Colors, select Custom, then set Windows mode to Light and App mode to Dark. Your taskbar, Start menu, and File Explorer will stay light while supported apps switch to dark.